This chapter contains the following topics:
Using the Checkbook Entries Selection
Use the Checkbook entries selection to make checkbook entries or print a list of entries.
If you are not using any other Passport Business Solutions modules, use this selection to enter all your checking account activity.
If you are using the Accounts Payable, Payroll, and/or Accounts Receivable modules, you can also use this selection to add to entries transferred to the Check Reconciliation module from these other modules.
Instructions for using this selection to transfer funds between checkbooks are included at the end of this chapter.
If you are in start-up mode, you cannot use checkbook entries. Go to regular mode. (Refer to the Load Checkbook chapter for start-up mode.)
|
Note |
If you are now in regular mode, you may want to make some sample entries for the document numbers 991, 992, 993 and 994. |
Select
Enter from Checkbook entries from the C/R menu.
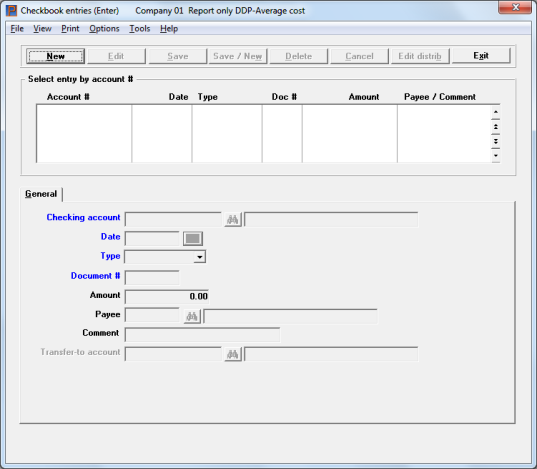
The following screen displays:
If there are no entries, the screen will look like above.
The list box displays up to 6 existing checkbook entries at a time. You may sort the checkbook entries by account number in ascending or descending order. Only column names in red may be sorted. To select a field or change the sort order, click on the column name or the arrow to the right of the column name or use the View options.
To locate a checkbook entry, start typing a account number. You may also use the up/down arrows, Page up, Page down, Home and End keys to locate a checkbook entry. The <F1> and <SF1> keys function the same as the up/down arrow keys.
The selected checkbook entry is available for changes or deletion. The fields for the selected checkbook entry display in the lower part of the screen.
The button and keyboard equivalents do the following:
|
New |
Alt+n |
To add a new checkbook entry |
|
Edit |
Alt+e |
To edit an existing checkbook entry |
|
Save |
Alt+s |
To save changes to a new or changed checkbook entry |
|
Save/New |
Alt+w |
To save changes to a new or changed checkbook entry and start adding another |
|
Cancel |
Alt+c |
To cancel adding or changing an entry |
|
Edit distrib |
Alt+b |
To access the distributions for an existing entry to view or change the distributions. See Distribution Entry |
|
Exit |
Alt+x |
To exit back to the menu. If you are in the process of adding or changing an entry this button functions the same as the Cancel button |
Menu Options
Many of the menu selections are the same from screen to screen. You have the following menu selections that are unique to this screen:
|
Print > Edit list |
Select this menu to print an edit list. See Editing a List |
|
Options > Post |
Select the options menu to post existing entries. See Posting Checkbook Entries |
Character Mode
In character mode, the following screen displays:
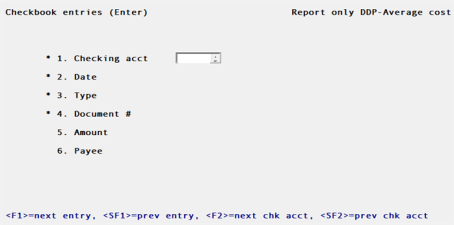
Options
In character, you can use these options at the Checking acct field:
|
<F1> |
For the next entry |
|
<SF1> |
For the previous entry |
|
<F2> |
For the next checking account |
|
<SF2> |
For the previous checking account |
|
<F3> |
To delete an account |
|
<F7> |
Applies only to second or future entries. Shows a previously entered account |
From the entry screen you can work with both new and existing checkbook entries.
Enter the information as follows:
For a new entry
Options
Enter the number of the checking account or use one of the options:
|
<F2> |
For the next checking account |
|
<SF2> |
or the checking account previously entered, if any |
|
Example |
Press <Enter> Type 1000 Press <Enter> for 000 |
Options
Enter the date for the entry or use one of the options:
|
<F1> |
For the next entry (in date order) for the specific checking account entered above in field 1 |
|
<F4> |
To enter a date using the calendar lookup |
|
<Enter> |
To default to the last date entered, or (for the first entry) to the current date |
|
Format |
MMDDYY. The default is the date for the previous transaction if there was one. |
|
Example |
Type 041519 |
Options
Enter the type of entry as follows:
|
Deposit |
Deposit into the checking account |
|
Check |
Check written as a payable or payroll check |
|
Adjustment |
Adjustment |
|
ACH payment |
If you paid via direct deposit, enter an ACH payment |
|
Transfer |
To transfer from one account to another. During posting a transfer becomes an adjustment type |
If the previous entry made was a check, you can press <Enter> to default to type C (Check).
Or use the option:
|
<F1> |
For the next entry for the specific checking account and date entered. (This may be used to easily locate a particular entry made on a specific date.) |
|
Format |
Graphical mode: Drop down list Character mode: One character |
|
Example |
Type A for Adjustment |
Options
Enter the document number or use the options:
|
<F1> |
For the next document for the specific checking account, date, and type entered above |
You can press <F2> to use the last document number plus 1. The incrementing of document number works as follows:
For checks, deposits, and adjustments entered this run, the last document number is stored for each type.
For subsequent entries, the default number is the last document number for that type plus 1.
|
Format |
999999 |
|
Example |
Type 991 |
Enter the amount or use the option:
Options
|
<F1> |
For the next document for the specific checking account, date, type, and document number entered. |
For a check
If the entry is a check, enter a positive amount. The checkbook balance will be decreased by this amount.
For a void check
Entering zero for the check amount causes a void check status to be assigned to the entry. Payee, is set to *** Void check***. The remaining fields cannot be entered.
For an adjustment
If an adjustment increases the checkbook balance (for example, Interest Received), enter a positive amount. If the adjustment reduces the balance (for example, Check Charges), enter a negative amount.
For a transfer
Enter a positive amount. The checkbook balance will be decreased by this amount. The account transferred to will be increased.
|
Format |
9,999,999,999.99- |
|
Example |
Type 12.00 |
For a check
Enter a payee number, then a name. If you have both A/P and Payroll, the lookup will prompt for Vendors or Employees.
|
Format |
Six characters for payee number |
|
Example |
25 characters for payee name |
For a void check
The payee number is set to blank.
The payee name is set to Void check.
For a balance forward, deposit or adjustment entry
Enter a comment appropriate to the entry. You can press <Enter> to leave the comment field blank.
For a transfer
You cannot enter this field.
|
Format |
Type 4/15 account changes in the Comment field. |
|
Note |
Enter a positive amount for the check entry (see For a check in field 5 above). |
This field is only accessible on a transfer type.
Enter the account to be transferred to or use the Lookup to select the account.
Options
|
<F8> |
For accessing the lookup to select the account |
|
Example |
Type 1100 Press <Enter> for 000 |
Distribution entry is not available for a transfer type.
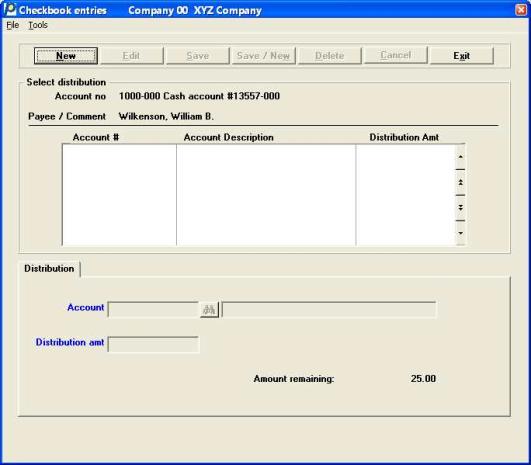
When you finished with the entry or you selected the Edit Distrib button, the following window displays:
In character mode, make any desired changes, press <Enter> at the Field number to change? prompt, the following pop-up window displays:
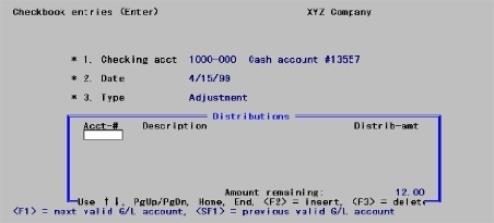
Enter this information in the distributions window:
Enter the account number for the account receiving the distribution.
The description of the account displays.
Enter the amount to be distributed to the account.
Amount remaining
You may distribute to multiple accounts, but Amount remaining must be zero to exit this screen.
Select
Edit list from the Checkbook entries menu.
Follow the screen instructions.
See a Checkbook List example in the Sample Reports appendix.
Once you have examined the Edit List and verified that the list is correct, you can post them to the permanent C/R data. There are two places you can post entries.
Transfers offset the accounts that were entered in the Checking account and Transfer to account fields. The Checking account becomes the debit and the Transfer to account is the credit.
Select
Post from the Checkbook entries menu.
or
While on the Checkbook entries (Enter) screen
Select
Post from the Options menu.
See a Checkbook Entries Register example in the Sample Reports appendix.
Select
Data import from the Checkbook entries menu.
Data Import is licensed separately and may not be available on your system. For information on using data import see the Data Import Manager documentation.